Thursday, December 30, 2010

Triple Orange and Cranberry Scones...


Just in the nick of time is my December scone of the month.  I have a good excuse for being so late - I've spent nearly every waking moment of the last few weeks in the kitchen, but just not making scones!


This scone is festive and "Christmassy" but not so much so that it can't be enjoyed any time of the year.  The triple orange flavour comes from orange juice, grated fresh rind and candied orange peel, (which I used because I had it left over from my mini fruit mince tarts).  The overall result is a soft, not-too-sweet scone with little bursts of cranberry and orange - a nice change from some of the heavy, spicy sweet treats on offer at this time of the year.  The recipe uses pearl sugar to create a bit of nice, sweet crunch on top, but if you don't have pearl sugar, then you could use regular granulated sugar, coffee crystals or a crushed sugar cube.

I have also used a different "base" scone recipe this month, simply because I don't have any cream to hand and it's snowing outside, and I just can't face going out into the snow just for a bottle of cream.  This recipe has butter instead, but gives a very similar texture and taste.

Triple Orange and Cranberry Scones:
Makes 20


* 3 cups plain (cake) flour
* 6 tsps baking powder
* 2 tbs white sugar
* 1/4 tsp salt
* 75g (2.6 oz) butter
* 1 cup milk
* 1 large orange
* 3/4 cup dried, sweetened cranberries
* 1/4 cup candied (glace) orange peel (optional, if you don't like it)
* 1/4 cup pearl sugar and a little milk for the scone tops

Preheat oven to 220 degs c (430 f).


Sift together the flour, baking powder, salt and sugar into a large bowl.


Grate the rind off the orange and place in a small jug.  Juice the orange and place the juice in the same jug.


Roughly chop the cranberries and glace peel and add to the jug.  Give it a stir.  Set aside.


Cut in the butter in to the flour mix using your fingers (or a food processor) until it resembles fine bread crumbs.  Add the fruit from the jug.

Pour over the milk and mix with your hands until you get a sticky dough.


Knead gently on a floured surface for a moment, then roll out to about 1 inch (2.5cm) thick.


Cut out star shapes, or whatever shape you like and place on a tray lined with baking (parchment) paper.


Brush tops with milk and sprinkle on the pearl sugar.


Bake for 10 -12 minutes or until slightly golden on top and cooked through.


Serve immediately with butter (to be honest, if they are still hot from the oven, you really don't even need it).  Scones can be frozen in a ziplock bag for up to a month and re-heated in a moderate oven.
Friday, December 24, 2010

Mini fruit mince tarts...


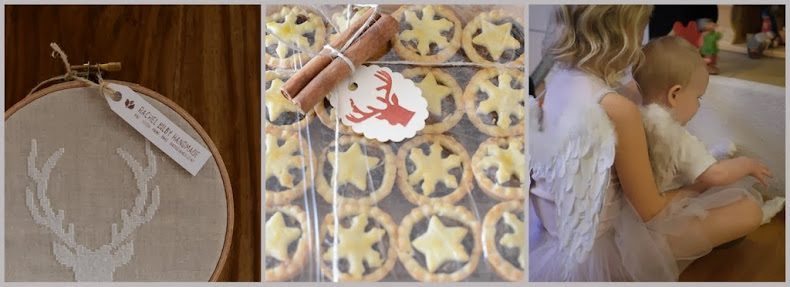
I have been making these fruit mince tarts for many years and they are so delicious they have converted many a non-tart-liker to a staunch lover of this lovely traditional Christmas treat.  The filling is not quite what you expect - quite fresh and a little tart, and there is no suet in these so overall they are much healthier.

Makes 35 - 40 mini tarts or 20 - 25 large tarts
* 125g (4.5 oz) each, sultanas, currants, dried cranberries
* 65g (2.2 oz) dates, softened in hot water
* 65g dried apricots
* 75g (2.6 oz) mixed glace peel
* 65g brown sugar
* 30ml (2tbs) lemon juice
* 2 ripe bananas, mashed

* 700g sweet short crust pastry
You will also need some mini muffin tins, and butter or baking spray.


Chop the sultanas, currants, cranberries, dates and apricots using a food processor on pulse or chopping with a sharp knife.  Place all the fruit in a large bowl.


Add the glace peel.  You may want to chop it roughly first.


Add the lemon juice, brown sugar and banana and stir well.


Set the mixture aside.  Preheat your oven to 190 degs celcius.  Grease your mini muffin tins with butter or baking spray.


With a circle cutter, cut out circles from your pastry and push them into the muffin tins.

You can leave the pastry to rest for 30 mins now (although I'm naughty and very rarely do).


Fill almost to the top with the fruit mince.


Cut out a star from the pastry and place on top.

I made several different tops, just for fun...

Snowflakes...

These were made by brushing the edges of the pastry case with a little water, then cutting out a circle of pastry which I then cut another smaller shape out of.

Glaze with a mixture of 1 egg yolk and 1 tbs water.


Bake for 20 mins (or until golden).


Serve with a dusting of icing sugar.  Make sure to keep a couple for Santa.  He has a lot of work to do tonight and I'm told he's partial to these particular tarts :).

LM x

Note on storage:  These tarts are great as they freeze well and just a few can be bought out at a time - they defrost easily at room temperature.  Can be frozen for up to 3 weeks.  Freeze them in a plastic container with layers of baking paper in between if stacking them up.  They also keep in the pantry in a biscuit tin for 1 week.

Thursday, December 23, 2010

Simple Christmas floristry ideas..


I took a wander to my local supermarket this afternoon with the intention of buying some flowers for the Christmas table and to make gifts.  There is a limited range of flowers available at this time of year, but luckily some of my favourites are still available.

 Can you see me and the Christmas tree in the reflection?

The other day I was in my favourite florist when I saw this idea of putting an orchid in a Christmas bauble.  The baubles were sitting in small glass ramekins, but I've adapted it so that the bauble sits on its own.


After removing the top of the bauble (I used proper glass ones), I poured sand into the bauble until it was just over half full.  I then topped it up with water and then popped the orchid in.  I used Phalaenopsis orchids because they are always beautiful and I have many happy associations with them as they were my wedding flowers.

You could fill a large dish with an assortment of these flower-filled baubles for a centrepiece, or,


 Place a bauble on each plate on your Christmas table.


Then I had some gifts to make, so I decided to make some rose arrangements like the ones I made with Lamb's ear, back in August.  I used Camelia leaves and some crystal pins for details.


These are a quick way to make those small last-minute gifts and will likely be well-received, especially if the recipient has entertaining to do.

LM x

Wednesday, December 22, 2010

Scenes from a pre-Christmas week...

It's been a big week here in our household.  My sister in law is here so the kids and I have been really enjoying her company.  We've also been enjoying the snow and many other Christmassy pursuits, especially baking.

So there's been...

 A little gingerbread baking...

A little fruit mince tart making...

A little bowl and spoon licking...

A little menu planning...

And there's also been...

Visiting Christmas markets in gorgeous medieval Swiss towns...

...snowy Christmas tree admiring...

...gratuitous use of my new Kitchenaid belgian waffle maker....

...grinning in the snow...

...posing for unsuccessful family pics...

...admiring the view...

...fondue consuming...

 ...and...

...snow angel making...

LM xx

Tuesday, December 14, 2010

Simple Christmas tree cupcakes, and a little party...

Today we had a Christmas party for the kids in our local English-speaking playgroup which I facilitate.

I made some cupcakes last night and decided to keep the decorating simple since it was my birthday and I really didn't want to spend all night in the kitchen!


I made some of my simple cupcakes, and buttercream, which I tinted green.    I piped on swirls of the buttercream using a large star tip.  This was a really easy way to create "Christmas trees" because you only needed one shade of icing.  All twenty cupcakes only took me about thirty minutes to decorate.


I cut out some yellow stars from some yellow fondant that I had left over from the Lightning McQueen cake for the top of the "trees".


Then a few sprinkles on top for the baubles and they were all done.


... and then they were all gone!


The kids had a great time - the food went down a treat, and we even managed a craft activity.  We made the "Reindeer food" that I saw on one of my favourite blogs, which was was a free printable from this blog.  The kids loved it, although the oats went everywhere!


What have you been baking and making for Christmas - I'd love to know!
Related Posts with Thumbnails