Monday, May 31, 2010

Scrapheap Challenge: Ways with pretty left-over fabrics, Part 2

2:  Make them into paper...

Yup, that's right.  If you have pretty fabric and a colour photocopier you can do some very clever things.  This doesn't necessarily use up your scraps but it can be a great way to make some matching items to go with other things you've made out of the same fabric.  Also, I love the fact that the grain of the fabric shows when you copy it, which is a lovely effect.  Make it into matching cards/ wrapping paper, or just add it to your craft papers to use another time.
And here is an idea of how to use that paper:


A delightful desktop confection, (and great rainy day craft project for kids)
Pencil tins:
You will need:
* A scrap of fabric about A4 size. (I used some fat quarters I have reserved for a sewing project and don't want to cut into, not strictly scraps, but you get the picture.)
* Clean food tins (preferably with no sharp edges especially if kids are going to use them)
* Double-sided tape
* Clear contact (stickyback plastic if you are in the UK, Duraseal if you are in NZ)
* Or a laminator and thin, flexible laminate sheets


Photocopy your fabrics (helps to iron them first if they have been folded in your stash for a while).  Putting a heavy book on top also helps, like this 1979 classic, 'Home Crafts' :).

Press copy!

Lay tin on back of photocopied page and mark the length of the tin on the paper, just inside the top and bottom lip.  Please excuse the stripy photo, I used my phone and the camera is rubbish!

Using a ruler draw two lines from the marks you just made, down the length of the tin.  As you see here one A4 sheet could easily make two tins.


Trim to your lines.

Wrap around the tin and mark where it joins, leaving an overlap of about 1cm.  Trim the excess.  If you don't want to use a plastic protective layer, you could just tape the paper on at this stage.  

Cover the right side of the paper with your clear contact or laminate it.  Note:  if you are laminating you will need to trim your paper strip by about 7ml along it's long side to allow for the laminate seams at the edges (keen laminators will know what I'm talking about). Trim contact/laminate.

Use a piece of double sided tape to join the seam. 


Find a little Picasso and give it to them, or have them help you make one!
Scrapheap Challenge: 3 ways with pretty left-over fabrics, Part 1


I love to make something out of nothing, I think it really is the spirit of crafting. But that means I'm also a bit of a hoarder when it comes to fabric and paper scraps, (see above photo, but a small selection of my material stash). So I thought I'd do some posts on some creative, cheap and fun ways to use them.

1. Make some push-pins and magnets...


Master J's notice board in his black and white nursery...

For a kid's bedroom or stylish notice board, it all depends on your choice of fabrics and you only need very small pieces.

You will need:

* Fabric scraps
* Scissors
* Metal backings for making fabric-covered buttons (in whatever sizes you fancy, your local craft/sewing store will have them)
* Epoxy resin (a type of glue which you will be able to find in your local hardware store, just ask)
* Cut-able magnetic strips or push pins

Make the fabric covered buttons as per the instruction on the back of the packet (they aren't hard to make). Or you could watch this quick tutorial on YouTube:


Cut the metal loop off the back of the button with a pair of strong scissors and pull it out so the back is flat.

Use Epoxy to glue a piece of magnet strip or a push-pin to the back of the button. Leave to dry for at least 12 hours (Epoxy really gets strong when it is left to cure for a while, but if you are impatient you can buy a "5 minute Epoxy".)

Find a magnetic or cork board and enjoy! A boxed set of 6 or 8 of these would make a lovely gift too :)

Variation:

Use epoxy to glue fabric covered buttons to a snap-clip, for a pretty girly accessory.


Here Miss S, on her 2nd birthday, wears an appliqued butterfly T-shirt and 
matching snap-clip I made for her for the day out of fabric scraps.

And another variation (keep the metal loop on the back of the button for this one):
A trio of fabric covered buttons is an easy way to customise a T shirt

        This one is well-worn as you can tell...

Sunday, May 30, 2010

Hello, Kitty, we meet again...

Must say, still struggling a little with Miss S's choice of theme for her up-and-coming 4th birthday party.  You see, I'm all about my daughter's birthday parties and love to get really creative, hand-making everything from invitations to take-home bags.  It's like planning a really tiny pink wedding. :)

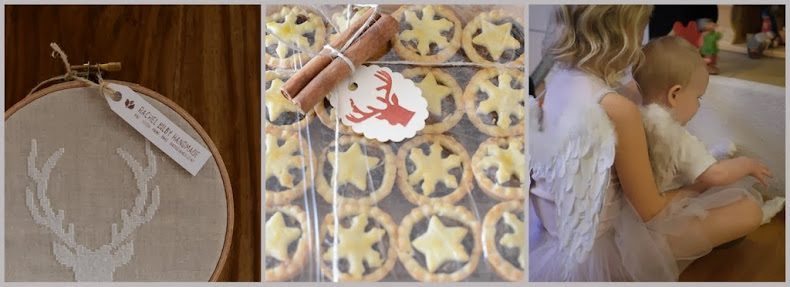
Last year, before Miss S started to have very clear ideas of her own, I came up with what I thought was a genius theme.  "Things with Wings".  Her guests were 50/50 boys and girls so I had to come up with a theme that lent itself to dressing up, could be girly, but could also be a bit boyish too.  And it was a great party (I'll do a little blog post on it I think, even though it is well past the fact).

This year, she wants a "Hello Kitty Party" which lends itself not to the handmade, but to the purchase of much pre-printed, expensive pink tat.  Oh, I tried talking her out of it before Mr Muck pointed out that I should get over myself and let her have what she wants ("it is her birthday party after all").  Hmmmmm.

So as a symbolic gesture of my eventual acceptance of the kitty, we went down to our local supermarket and I purchased some paper plates, serviettes and other bits and bobs for the layers in her pass-the-parcel.  All this came with the warning she was NOT to change her mind again.

So here we are three or so weeks later and I must admit I am starting to warm to that little kitty.  I sent out pre-printed invitations (gasp!), which took me about 30 minutes to finish.  I can already see some benefits to doing things this way.

The Party is in three weeks and I'm really looking forward to it.  I'm sure I'll find ways to flex my creative muscle, but I realise that making her happy will be the best part.  After all, this is the only little kitty she'll ever have (I'm allergic to those real ones).

Party blog post with pics to come!

Friday, May 28, 2010

"Do you Kitchenaid?" "Yes, I Kitchenaid".

Every one of my friend's husbands are hating on me right now for bringing to their wive's attention how happy a Kitchenaid stand mixer can make a woman.  Especially in their favourite colour, or in my case, "Hoch Glanz Chrome" - or in English, "ridiculously shiny chrome".

That thing has looks and power, a giddy combination.  I have been so taken with it that I have been caught trawling the internet late into the night looking for Kitchenaid recipes, and looking at my reflection in it's bowl while my children eat cheerios off the floor.


So I may be sharing some recipes with you over the next few weeks as I try (and invariably, fail) at making things with this masterful machine.  For those of you who are already "with Kitchenaid", please feel free to send me links with recipes to try.

I don't have a life, so I might as well have a blog...

Well, I've gone and done it now...  To add to all my other hobbies, (which are so multitudinous, they are actually a source of stress rather than pleasure in my life), I have now gone and started a blog.

But it's not a decision I have taken lightly, having toyed with the idea for a couple of years now.  I wanted to make sure that I actually had something to offer the blogosphere (does anyone still use that word, or am I stuck in 2007?).  I'm still not sure I do, but hey, there's always a delete button if that's the case.

So please join me on this not-particularly wild ride through my life as it is at the moment.  My intention is to share with you the creative stuff I do, and how it dovetails in to my job as mum to two of the most beautiful, clever and funny little kids you ever did meet (except for your kids, of course).  They make me want to me a more beautiful, clever and funny person, and, as an unexpected bonus for all that hard slog that comes with parenting, I have found this amazing surge of creativity since becoming a mum.

So, it will be recipes, craft ideas (and perhaps tutorials), skitey pics of awesome stuff I've done/places I've visited, funny parenting anecdotes, and, I apologise in advance, lots of exclamation marks (and mid sentence sidelines in brackets), because I do that.

And now to come up with that all important next post...
Related Posts with Thumbnails