Wednesday, December 14, 2011

Crocheted star pattern and tutorial...


I thought I would do a quick tutorial for those that are interested in whipping up a few of these stars in the lead-up to Christmas.


They are really simple and I have included step-by-step pictures to help if you are beginner at crochet.

Just a few things to start:  I am going to use UK crochet terminology, a 2.5ml crochet hook and baby cotton.  You can experiment with the yarn and hook size to get the look you're after.  My instructions are illustrated in the picture(s) above them.  The pattern is written below in full, without pictures, for those that like to work like that.

I give full acknowledgement of the base pattern to a rather ancient, out-of-print book given to me by my Grandmother many years ago, "Reader's Digest Complete Guide to Needlecraft".    If you ever see this book for sale in a second hand store, grab it.  It's my needlecraft Bible.

Step one:


Chain 2

Step two:


5 dc in 2nd chain from hook

Step three:


3 dc in each dc (you will now have 15 "chains" around the circle).

Step four:
Now begin to form the 5 points of the star.


1 dc in next stitch


ch6


sl st in 2nd chain from hook, 1 dc in next ch, 1 htr in next ch, 1 tr in next ch, 1 dbl tr in next ch, 1 dbl tr in base of starting dc


sk 2


dc

Repeat step four a further 4 times to create five points

Step five:


Sl st in first dc to join, fasten off, leaving a 20cm tail if you wish to create a loop for hanging.  Weave in ends on the reverse.

Step six:

Blocking:
These stars benefit from a little blocking and starching to remain flat, as they are prone to curling up at the points.

Lay out the stars on a surface like your ironing board covered in some paper towel or an old tea towel.

Pin the corners with the pins on an angle pointing in towards the centre of the stars.

Give a blast of spray starch and leave to dry overnight.  If you are in a real rush you can spray the stars with starch and then iron them.  They will go flat, but won't necessarily have the best shape that they might have with blocking.

Use as desired.  Eight of these packaged in a nice cellophane bag makes a lovely gift.  You can embellish them with sequins, beads or buttons, or applique one to a winter hat, scarf or mittens.

If you don't know how to crochet, it is relatively easy to teach yourself using tutorials on youtube.

-------


Crocheted Star Pattern (UK terminology)

Ch 2
Round 1:  5 dc in 2nd ch from hook
Round 2:  3 dc in each dc
Round 3:  (1 dc in next st, ch 6, sl st in 2nd ch from hook, 1 dc in next ch, 1 htr in next ch, 1 tr in next ch, 1 dbl tr in next ch, 1 dbl tr in base of starting dc, sk 2, dc) Repeat 4 more times
sl st in first dc to join, fasten off.
Tuesday, December 6, 2011

Making Christmas, special...


A strange little mish-mash of things in today's post.  I thought I'd just share a few of the things that I've been making and baking in the lead-up to Christmas, and I'd like to invite fellow bloggers to link up to this post below (in the comments section) to show myself and other readers what you've been making and baking too!


I tried a new recipe for gingerbread and made these trees.  All you need is a good gingerbread recipe and a nesting stack of star cutters - mine had 10 layers.  Bake the cookies and then sandwich them together with a generous dollop of royal icing in between each layer, checking to see if the tree is straight as you go.  Ice and decorate as desired with sprinkles etc.   They make great presents as the receiver can enjoy it as a table centerpiece, or with a cup of tea.


And speaking of gingerbread, I made a gingerbread house for the kids to decorate.  They had a lot of fun and made a lot of mess.  This year I saved myself a bit of time and purchased one of these to cut all the pieces out instead of using paper templates.


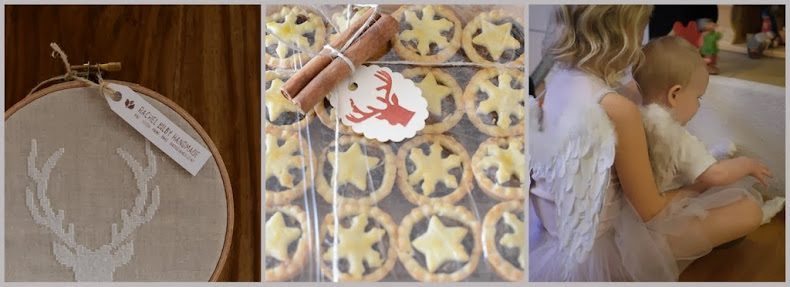
I made copious amounts of Christmas mince tarts (recipe here).  I have a lot of British friends here in Switzerland so the tarts always go down well as you can't find them in the supermarkets for love or money.


I knitted this merino hat and mittens for a friend's baby girl using this pattern.  I lined the mittens with jersey cotton so they are extra soft and warm on her little hands.  I can't wait until after Christmas and I can start on a set for my new baby.


I was especially pleased with how the embroidered tag came out.  I used a cursive font alphabet pattern I had already, and then free-stitched the ball of wool and needles, zig-zagging it on the machine and fraying it to finish.


This lavender laundry spray is such a great gift and so easy to make.  It is made from essential oil, vodka and filtered water, recipe and instructions, here.  Bottles from Ikea.


This spice wreath made out of cinnamon sticks and star anise was surprisingly simple.  I just drew a wide ring on an old piece of cardboard and got out the glue gun and started arranging the sticks within the ring, (using the template below as a guide, but not actually sticking the sticks to it).  The whole thing took me less than thirty minutes to make.  A bit of gingham ribbon or raffia threaded through one end would mean you could hang it on the door too.  This picture doesn't show how good it smells :).


I made these gift-tags for all my handmade presents which will be given out to friends here, and a set of 24 for the runner-up prize for my giveaway.


These crocheted stars will be on all the gifts I give in New Zealand.

Wow, when I look at it like that, I have been busy!  Can't wait to get on the plane home.  Less than two weeks to go, and my to-do list keeps expanding.

If you are a blogger, please feel free to post a link in the comments below and show me what you've been making for Christmas this year, I'd love to check it out.

Frohe Weihnachten!

Monday, December 5, 2011

And the winner is.... (and a runner-up prize too)...

The prize pack...

Thanks for all the entries into my Handmade Christmas Giveaway!  I loved reading about all your Christmas wishes - as varied as they were beautiful.


So, without further ado, here are the results.  Miss S allowed me to interrupt her painting long enough to draw the lucky winner(s) from the hat, or bowl in this case.  It's a little more fun than random.org. :)


Congratulations, Meghan!  I will be in touch with you shortly and will be sending the prize-pack off ASAP.  Your comment was:

"I'm wishing for this giveaway! j/k ok no I'm not, you are so talented. And congrats on 100 posts!!! I've been wishing for plane tickets to Zurich from Santa, know anyone that could put a word in for me? ;)"

Glad that I could actually make that wish come true, well, half of it at least.


But the fun doesn't end there, oh no.  I got a little bit extra crafty, and I made this set of 24 gift tags as a runner-up prize.  And these will be winging their way to....


Congratulations, Jane.  Your comment was:

"Good health! Last Christmas was a diaster as I got sick before Christmas, went to the Dr then had a reaction to the drugs! The whole thing was a blur and I was so disappointed. It has to be better this year!!"


I really hope your wish comes true, and that Christmas is so good this year that it makes up for some of the fun you missed out on last year.

My Christmas wish is a little selfish.  I am hoping for safe and happy travels for our little family as the four of us head to New Zealand.  It is 30 hours of travel with two 12 hour flights back-to-back.  I am just hoping that none of us get sick before the journey and that we don't annoy the other travelers around us too much!

I have a "Christmas creativity round-up" coming up soon and an opportunity for fellow crafting bloggers to link to what they've been up to and show the world.  I'm really looking forward to that!

LM x

Monday, November 28, 2011

... A Handmade Christmas Giveaway!

- This giveaway is now closed -

Click here to see who won.


This is my 100th post!  To celebrate I have been working on a hand-made Christmas prize-pack to give away to a reader.

The gift pack includes:


* 8 red crocheted stars
* 8 white crocheted snowflakes
* 1 x 1m length of hand-crocheted ric-rac in red
* 1 x 1m length of hand-crocheted ric-rac in green
* 1 x 1m length of hand-crocheted ric-rac in white
* Double-sided Christmas fabric bunting (2.4m length)
* 1 x 40 x 40cm Christmas patchwork cushion cover (to match the bunting)
* Postage to anywhere in the world where the winner lives!

More details and photos of the prize pack are below, but first here's how to enter:

All you have to do is leave a comment on the post below, and tell me what you are wishing for this Christmas.  Entries close at midday here in Switzerland, Monday 5th December (GMT+1). The winner will be selected shortly after by random.org, or by Miss S drawing a name out of a hat :).

Entries from anywhere in the world are accepted, but any entry which is made where entrant is "anonymous" and leaves no contact details will be void, and won't be included in the draw.  This means you must log in to leave a comment (so I can contact you via blogger), or if you wish to post "anonymously", please include your email address like this:  "me(at)myemail(dot)com".

Good luck!

LM x

--------------------

Details of the prize-pack:


The snowflakes I made using this great tutorial from the blog Attic24.  Both the snowflakes and stars are made from 100% cotton yarn and have been blocked and gently starched.   Watch this space as I will do a tutorial on how to crochet the stars - they are very easy and a satisfying evening project.  I have actually crocheted over 30 of them in the last week as they are also going on all my Christmas gifts this year.  Both the snowflakes and the stars have a loop attached so are ideal for hanging on the Christmas tree, stringing along a garland or swag, decorating presents, or you can snip the loop and applique them on to a garment or sewing project.  Lots of uses!


The ric-rac I made using this tutorial from the blog Foxs Lane.  Again, it is 100% cotton and each strand is 1m, although you can stretch it to about 1.2m.  It's perfect for draping on the tree, making into a garland, wrapping presents or you can sew it on to your projects in the same way you would normal ric-rac.  Note: because it is made using one continuous strand of cotton yarn, you cannot cut it without it unravelling.  If you want to cut it, you will need to immediately sew the cut ends to avoid unravelling.


The patchwork cushion cover is made from printed cotton and on the back features three of my Grandmother's vintage buttons with crocheted loop fastenings.  It will fit any 40 x 40cm cushion inner and looks good whichever way around you place it.


The bunting is double-sided so can be hung in a window and enjoyed from both sides.  My idea was that you could create a little Christmas book reading corner with the cushion and the bunting.  Just add a basket of your favourite Christmas picture books, and you have a really cute space for some serious Christmas relaxing!

LM x

Tuesday, October 25, 2011

Quick Halloween Cupcakes...


I woke up this morning with that nagging feeling that I had to do something today.  Then I remembered mid-morning that I was asked to take some cupcakes to a friend's Halloween party in the afternoon - yikes!

So, I quickly baked up a batch of easy vanilla cupcakes and then took a look at what I had lying around to decorate with.  A little bit of white fondant, a little bit of gumpaste and a bar of chocolate.  Hmmmmmm....


I settled on a couple of ideas.  Pumpkins, and a scary, but cute "BOO!"

The little pumpkins were so simple to make.  All I did was tint the white fondant orange, then roll tablespoons of it into balls.   Then using the blunt edge of a sharp knife, I made the lines down the sides.  Lastly, I took whole cloves and pushed them, "star-side" down, into the top of the pumpkin.  I made seven of them and they took me about ten minutes to model.


I made a big batch of vanilla buttercream and tinted half orange.  Actually, I made quite an important discovery today on the the buttercream front.  I made an all-butter buttercream with a little milk, but the consistency was wrong - gritty, too sweet and quite dull to look at.  So I added two tablespoons of vegetable fat (crisco, kremelta, copha) and it became incredibly glossy and a beautiful texture.  Usually I avoid half crisco/ half butter buttercreams as they are notoriously hard to tint properly and also can give you a slight aftertaste from the crisco.  However, this time, the addition of a small amount of vege fat made such a huge difference -but not to the taste.

Anyway, 'scuse my tangent.  The little pumpkins are sitting on a bed of grated milk chocolate (would have used dark if I'd had it).  I eschewed piping today, because of time constraints, so the icing went on with a bread knife - so much quicker and not as much cleaning up.


The BOO lettering was made from gumpaste tinted black and cut out using my gumpaste cutters (which you can see in this post).  I pulled the "O's" slightly to elongate them - they just seemed slightly scarier that way!

The key to being successful with your gumpaste/ fondant cutters is to roll out the gumpaste very thin and to use vegetable fat on both the cutter and a little smoothed onto the surface of the gumpaste with your finger. Have a toothpick at the ready to remove the centres of letters as well.  Using a small off-set spatula is a great way to transfer the letters to your drying surface, and for a drying surface baking paper works well, just make sure that its on a very flat surface.

Do you and your family celebrate Halloween?  If, so I'd love to hear about your traditions.

Sunday, October 16, 2011

The Tiny Kindness Project...

Something a little bit different today.


I have been thinking about this idea a lot lately, and finally after a really good, encouraging conversation with my brother, have put it into action.

I have created a Facebook page where people can share about the effect of very small kindnesses on their lives, whether they are the giver or the receiver, or even a bystander.

My hope is that people will be encouraged by reading stories of small acts of daily kindness in their newsfeed, and will be inspired to start thinking deliberately about what they can do to join in.  I have always really believed in the accumulative affect of small acts.

So if you'd like to be a part of this you can click on the link below to be taken to the Facebook page.  Please feel free to share this idea around if you think it worthy.

Tiny Kindness Facebook page:

http://www.facebook.com/TinyKindness

Right,  back to preparing some Autumn crafts :)

LM x

Thursday, September 29, 2011

An Upsy Daisy Cake...


We have just returned from a lovely little birthday party, and so it's time to clean the kitchen and blog about the cake - but just not in that order!

With the Lazy Daisy cupcakes from my previous post
My friend - whose daughter was the birthday girl - has just recently had a baby, so I offered to make the cake for her knowing that would be one less thing for her to worry about.  Secretly, I was going through withdrawal knowing that it would be April before I needed to make another cake for one of my own kids!


The birthday girl loves the BBC show "In the Night Garden", and especially Upsy Daisy, so a theme wasn't difficult to choose.  I took some inspiration from this image I found online, but decided to modify the design somewhat to suit the materials I had available.  It bought back quite a few memories really - In the Night Garden was the first TV show Miss S ever watched, and my first experience of watching children's TV since I was a kid.


The cake was a 20cm white layer cake (recipe is linked to on my post about the Hello Kitty Cake) in three layers with vanilla buttercream between each layer.  The board was 25cm (only size I could get) so I pushed the cake to the back of the board - rather than centering it - to leave room for the lettering and the flower decorations at the front.


Upsy Daisy took me two and a half hours to model, and there were many moments where I almost gave up as she is quite an intricate character featuring many colours, stripes and small details.  I'm glad I stuck with it though, as I learned a lot from her.  I didn't have a 3d model to refer to (normally I would use a doll or 3D toy), but found a good picture on the internet to work from.

The leaves were made by rolling gumpaste super-thin and then cutting out circles  using a piping nozzle.  I then used the same nozzle to "slice" off the leaf shapes - I was able to get 3 leaves from one little circle.
All the decorations are made from gumpaste, except the rocks behind Upsy Daisy, which are fondant.  I felt that I had probably watched enough of In the Night Garden over the years to feel comfortable making some decorations that reflected the programme's aethestic!  I finished it off with a good spray of edible shellac, which I just love because it really brings the cake alive and helps cover some of the rough spots and dusty icing sugar on the surface.

That reminds me, I have a slice of cake in a take-home bag that's calling my name...  Cup of tea time I think, the mucky kitchen can wait.

LM x

Lazy Daisy Cupcakes...


This afternoon we celebrate a little friend's 2nd birthday.  The birthday girl loves Upsy Daisy, from the BBC childrens' show "In the Night Garden", so I made these daisy cupcakes to go along with her Upsy-daisy cake (pictures of that to follow).


The cupcakes are vanilla (recipe here), the icing is plain butter buttercream tinted grassy green, and the flowers are all made from gumpaste.  I used a daisy patchwork cutter (see here) to cut the large daisy, and small daisy cutter which I have had for years to do the small ones.  I left them to dry in flower forming cups - a recent, and very awesome purchase - so they were slightly curved.


I hope the birthday girl enjoys them as much as I did making them.

Update:  Here are the pics of the matching Upsy Daisy cake.
Related Posts with Thumbnails