These are not the kind of bibs you wear for mealtimes, but are the dribble-catching, "cowboy" kind, and I think they are a rather smart accessory in addition to being practical. Being reversible is also handy as if it does get a bit grubby on one side you can whip it off and change it around, which I am all about.
Master J was a bit "over" being a model by this point...
Reversible Neckerchiefs:
You will need:
For the re-usable pattern:
* 3 pieces of A4 copy paper
* Stickytape
* Pencil
* Ruler
* Scissors
For the bib:
* 2 pieces of cotton fabric big enough for the pattern in two complimentary colours/patterns. (Jersey cotton works well, but I have also used plain cotton fabric and flanelette with success.)
* Matching thread
* Scissors or rotary cutter
* Sewing machine
* 2 gripper studs (more about these including a picture of the packet, below)
* A hammer
* Needle and thread
Making the pattern:
Tape all three pieces of A4 paper together side to side, with no overlap.
Place it on a hard surface, tape side down. Fold it down the centre and open again.
With your ruler along the crease you just folded, measure 10cm up from the bottom edge and make a mark.
Likewise, now make a measurement of 5cm from each of the top corners.
Join up all three points with your ruler. Nearly there!
Decide what size you want. For 18-24 months measure 3cm inwards from the top corner of the bib, for 12-18 months measure 4cm, and 6-12months measure 5cm, as shown in the picture.
Cut the pattern out. I cut it out for the 12-18 month size. It's now ready to use!
-----------------------------------------------------------------------
Making the bib:
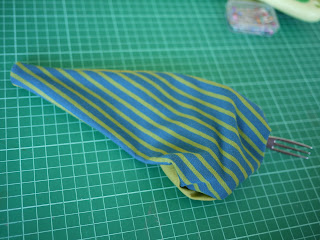
Pin your pattern to your fabrics individually and cut out two pieces, or use a rotary cutter and ruler to cut them out (as pictured here).
Place two pieces together with the right sides of the fabric facing inwards and pin.
This picture shows the opening at the top.
Turn the bib in the right way. Use the blunt end of a pen (or a fondue fork - how Swiss!) to gently push out and shape the two corners where the fasteners will be.
Ladder stitch the opening closed. (Ladder stitch is a hand-sewing stitch which is invisible when completed - if you want to learn to do it, please watch this YouTube video:)
Alternatively you could just sew straight across the top of the bib with the sewing machine to close off the hole.
Press lightly with an iron.
Attach the gripper studs to the two far corners as shown.
Gripper studs in the packet
It's probably best to refer to the instructions on the back of the packet as each brand has a different method of attachment. You can get different types for use with different fabrics so if you are using jersey cotton look out for grippers labelled "Jersey". If you want to make the bib adjustable for growth or comfort, you could attach an extra stud to the bib, just on one side, around 1.5cm apart as pictured.
Once you have attached the studs, you can say "Voila!", because you are all finished!
Find a little dribbler and make his or her day. Alternatively you can adapt this pattern to make a neckerchief for your pooch... just make sure you make it as wide as you need it.
(Make sure babies and toddlers are always supervised whilst wearing these neckerchiefs and they must never put put down for a sleep or nap with them on - common sense rules!).


OMG, they are so cute.... I'm about to go and see what fabrics I have lying about, definitely going to be sewing one of these for my 9 mo tonight! Thanks for the pattern and how-to.
ReplyDeleteThanks Gretchen, glad to hear you will be using this pattern! Good luck with your evening's sewing :)
ReplyDeleteThese are very cute - I almost wish I had a need for them! Unfortunately the only dribbler I knew was Mr Whiteley RIP.
ReplyDeleteoh gods you are so awesome honey. I want a wife like you to bring up my children! <3 <3 <3
ReplyDeleteGreat tute! And your little guy is just adorable! Who knew that cowboys wore neckerchiefs because they drooled....? :) Thanks for linking up! Please come again!
ReplyDeleteReally easy and a great idea! I just made a bunch of these using material from old t-shirts.
ReplyDeleteThat's a great idea Alison - upcycling!
ReplyDeleteThanx for your comment! I was over the moon with this pattern!!! THANKS a million :)
ReplyDeleteYou're welcome Jessie - thanks for dropping by and commenting!
ReplyDeletedo you put the snaps on with pliers or with a hammer and the tool? i can't figure out how to get the snaps on. the directions are NOT helpful. help!
ReplyDeleteHi - yes, usually you put the tool on top of the snaps and hammer it in with a hammer. I guess it depends on the brand of snaps as to how they are applied, but that's always been the way mine have been. :)
DeleteMy pattern seems wider than yours. Maybe something was lost in my metric/A4 conversion. Could you provide the length measurement for the biggest size?
ReplyDelete